
If you’ve ever watched a video or animation and noticed smooth transitions, rather than abrupt changes, chances are that you’ve witnessed the magic of easing. As you embark on your journey into video editing and motion graphics using Adobe After Effects, understanding how to ‘Easy Ease’ keyframes is essential. Despite the slightly unusual name, ‘Easy Ease’ is a powerful tool that brings fluidity and professionalism to your animations and transitions. Let’s delve into the world of After Effects and discover how you can apply this technique, even if you’re a beginner.
What are Keyframes?
Before we jump into the process, let’s quickly define what a keyframe is. In After Effects, a keyframe denotes a point in time where a specific change occurs, whether that be in position, opacity, scale, or other attributes. Placing multiple keyframes allows you to create an animation by interpolating the values between them.
Why should you Easy Ease?
The standard keyframes in After Effects create a linear motion between points, which often looks mechanical. Imagine a car starting to move at 50 mph instantly and stopping just as fast. It doesn’t feel natural. Easy Easing helps to simulate the natural movement by gradually speeding up at the start and slowly coming to a stop, just like how things move in the real world.
Step-by-Step Guide to Easy Ease keyframes
Open After Effects and create a New Project (Ctrl/Cmd + Alt + N) or Open your Project File by going to File > Open Project (or Ctrl + O).
Positioning the Timeline Indicator
Look at the timeline at the bottom of your screen. The blue or green vertical line (depending on your After Effects version) you see is the ‘Timeline Indicator’:
![]()
Drag this to where your keyframes are or where you want to add new keyframes.
Quick tip: If you hold Shift while dragging the timeline indicator, it will snap to specific points like: the start or end of your footage, markers, or keyframes (when visible).
Select or Create Keyframes
Follow the steps which apply for you:
- If you already have keyframes in place: Click on the layer with keyframes in the timeline. You’ll see little diamond shapes
 – these are your keyframes.
Select the layer and press U when your layer has keyframes but they’re not visible. - If you’re creating new keyframes: Click on the stopwatch icon next to the attribute you want to animate (like ‘Position‘ or ‘Scale‘). This will create a keyframe at the current time.
Apply Easy Ease
Single Keyframe: To apply Easy Ease to a single keyframe, right-click on the keyframe. A context menu will appear. Hover over ‘Keyframe Assistant‘, and then select ‘Easy Ease‘. You’ll notice that the diamond shape of the keyframe turns into an hourglass shape, indicating that it’s now an Easy Ease keyframe.
Multiple Keyframes: If you want to apply Easy Ease to multiple keyframes at once, click and drag your mouse to select them all. Then, right-click on one of the highlighted keyframes, hover over ‘Keyframe Assistant‘, and choose ‘Easy Ease‘.
Shortcut: Select the keyframe(s) and press F9 on your keyboard to quickly Easy Ease your keyframe(s).
Adjusting the Speed Curve (Optional)
For more control over the easing effect, you can adjust the speed curve in the Graph Editor.
Click on the ‘Graph Editor‘ button ![]() above the timeline (it looks like a white graph icon).
above the timeline (it looks like a white graph icon).
Ensure that you are viewing the ‘Value Graph‘. You can switch between graphs using the dropdown menu at the bottom of the Graph Editor ![]() or right-clicking > Edit Value Graph.
or right-clicking > Edit Value Graph.
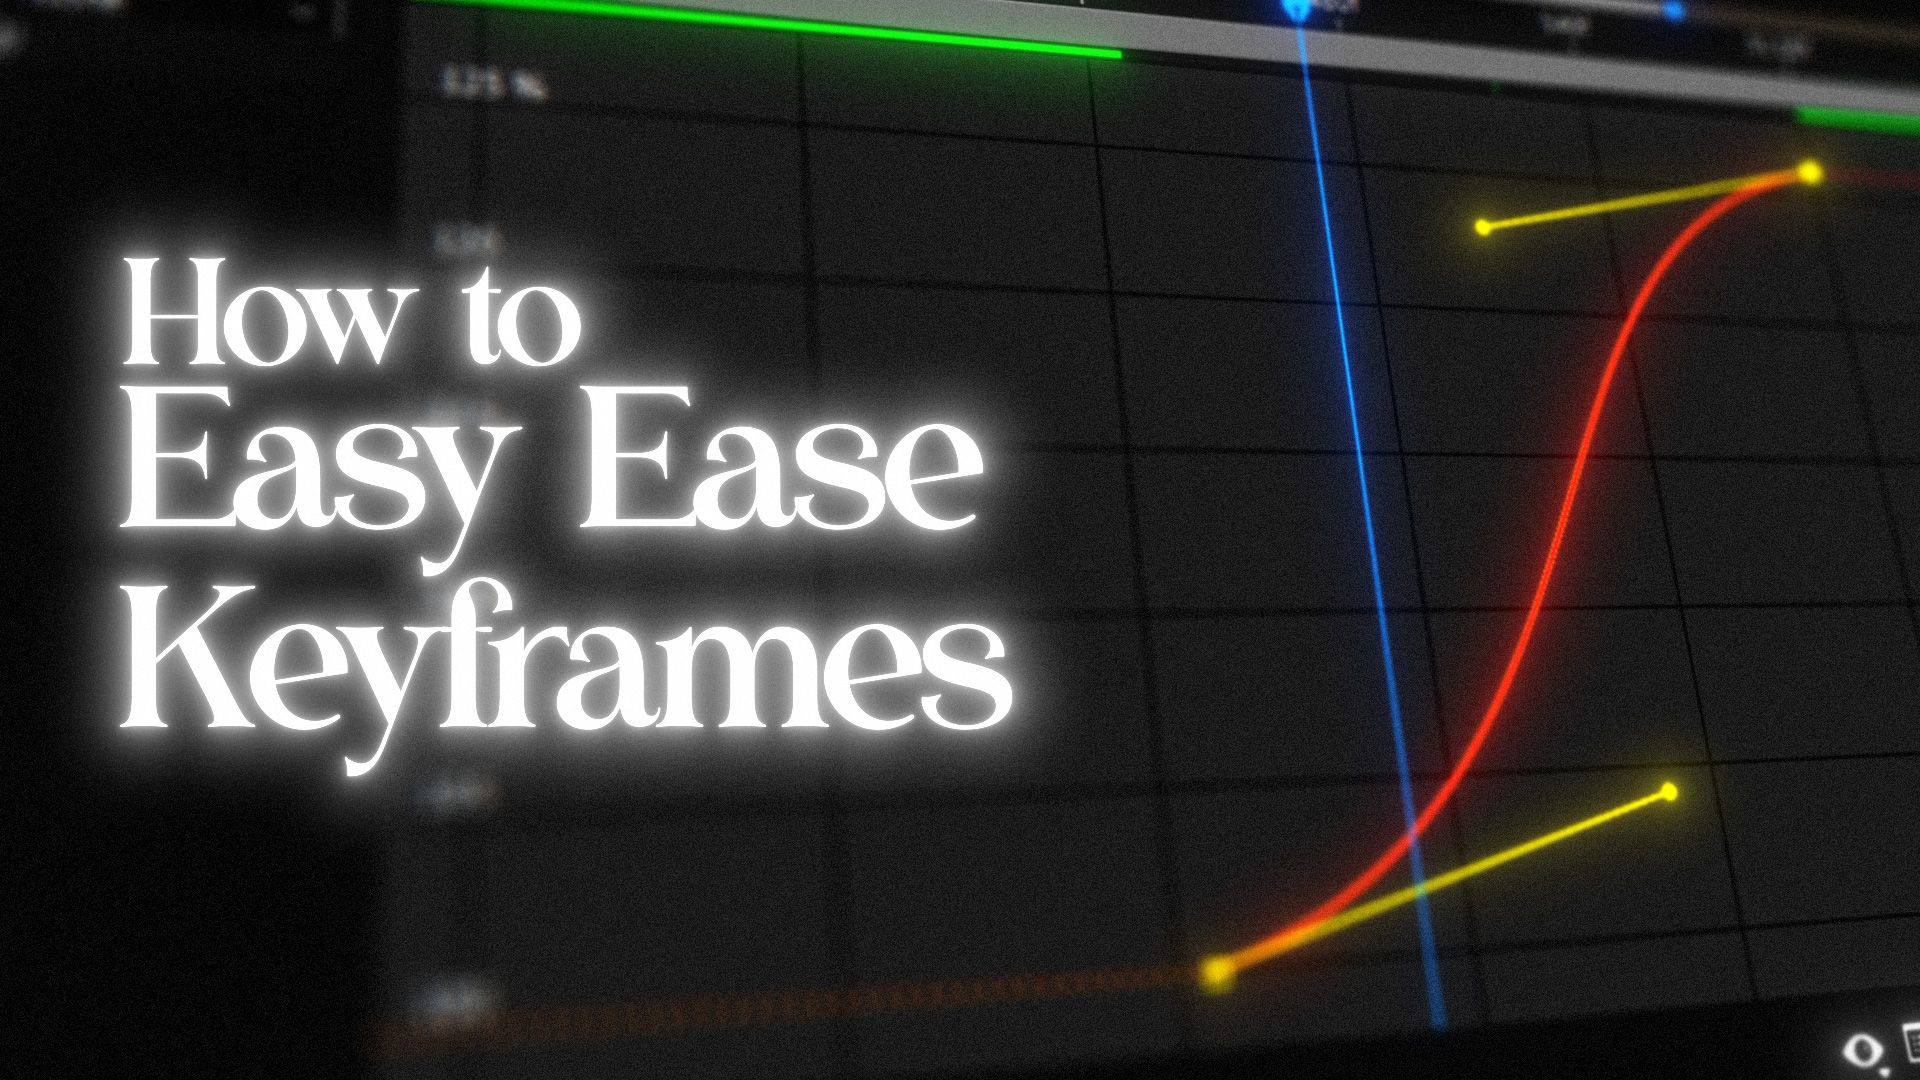
Now, you’ll see curves between your keyframes. Select a keyframe and drag the handles on the curve to adjust the easing. The steeper the curve, the faster the animation; the flatter the curve, the slower.
Here is a good example on how the curves work:

Credit: leanndro.com
In animation, the devil is in the details. While setting up keyframes gets your elements moving, the nuance of ‘how’ they move can make a significant difference in the final output. The Easy Ease function in After Effects is a beginner-friendly tool that is easy to use but hard to master.
