
We’ve all worked with Transform values at one point or another, likely graphing a bunch of keyframes to make something move smoothly just the way you want. When it comes to keyframing Position, the Separate Dimensions feature is a godsend for this purpose, allowing you to view each graph (and, more importantly, their handles) individually.
But what about other properties that don’t let you separate dimensions? Something like ‘CC Vignette‘s center value, or ‘S_BlurMoCurves‘ center value? Flow, along with similar extensions, might be able to graph for you, but those would apply to both of the graphs at the same time, which isn’t always ideal. Take for example, a simple vignette:

I want to graph a vignette to start at the top left corner of my screen and end at this gray dot to the right without ever seeing the blue shape layer:

Creating a third keyframe in the top right would require adjusting both its timing and location, while also tweaking the graphs to ensure smooth movement – a process that adds significant extra work. Using Flow or another graphing extension on the two keyframes would still cause the movement to go across the shape layer, though with smoother movement.
The solution lies in the Slider Controls, a long-underrated feature in After Effects. We’ll walk through this process step by step:
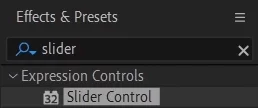
- Add two Slider Controls to the layer with the property (in my case, this is CC Vignette) via the Effect Controls panel.
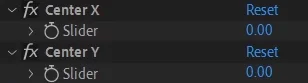
- Rename these Slider Controls to something that says X and Y respectively. I named mine to ‘Center X‘ and ‘Center Y‘ to more clearly note what they were:
- If you have any keyframes on your original property, copy them over to the Slider Controls. Then delete any keyframes on the property:
- Finally, hold Alt while clicking on the property’s stopwatch to open a text box. Enter the following expression:
[effect("Center X")("Slider"), effect("Center Y")("Slider")]
Make sure “Center X” and “Center Y” are the exact same wording of the slider control names you gave them earlier. You should now see the same animation as before if you already had keyframes. If not, try moving around your center value with the slider controls. If it works, the rig is complete!
You should now be able to graph those annoying values to your heart’s content!
In this article we go over the difference between Speed Graphs and Value Graphs.

If you find yourself referencing this article often for a certain effect, you can also choose to save the three effects together as a preset via ‘Animation > Save Animation Preset‘ in the top left corner of your screen.

murder
super helpful! keep up the great work